Last year I had so much fun creating and recieving postcards in iHanna's annual postcard swap that I joined up again this year. I meant to put a link and promote it before the deadline but I was sidelined with a nasty cold and didn't do much online work at all for a few weeks.
Unfortunately I didn't take many progress pics except a few on Instagram.
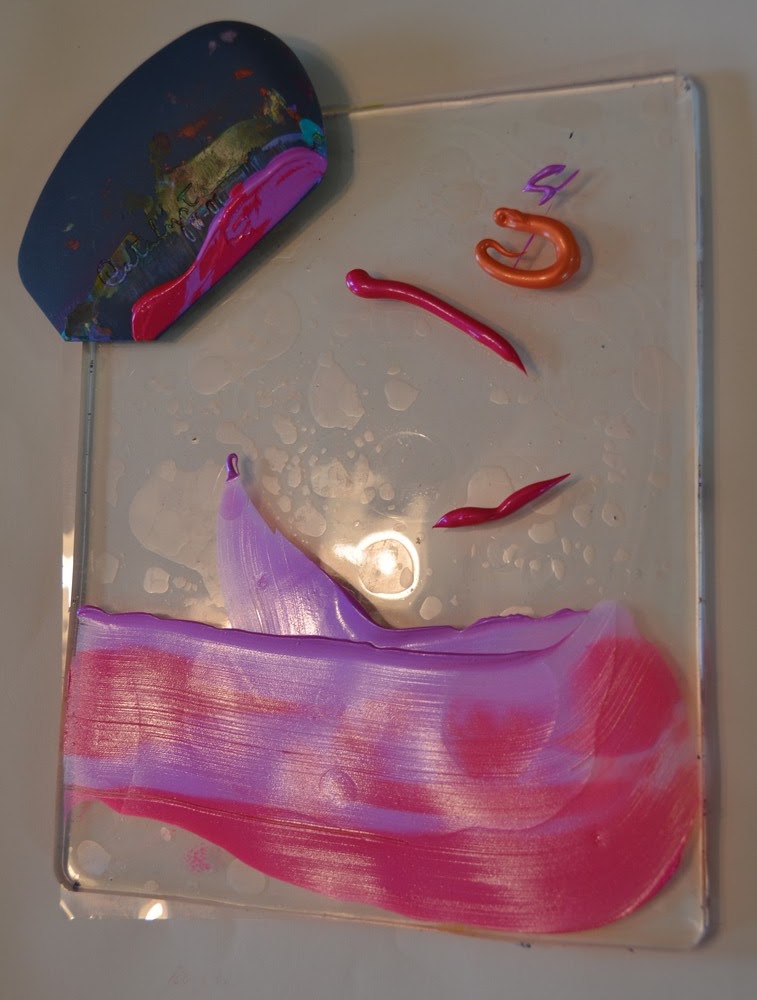
I started out with some Strathmore paper and used my Gelli Plate and acrylic paints with stencils to lay down a background. With several layers of paint on the papers I drew Mandalas strategically so that once it came to cutting the postcards to size there would be a fair portion of Mandala on each postcard. After drawing on the Mandalas - I applied a glaze with Glaze Medium to seal and put a shine over the entire card.
These are the 10 cards - 4"x6" - they are all hand addressed and fancied up with some of my favourite washi tapes on the backs.
I am excited to recieve my postcards!! Thanks for all your hard work organizing the swap Hanna!!
Showing posts with label stencils. Show all posts
Wednesday, April 03, 2013
Thursday, March 21, 2013
Making Stencils
On my quest for authenticity - I have been wanting to make my own stencils for quite some time now but kept pushing it aside. Actually, I've had the supplies for over 6 months and it was high time to dig them out and get with it. After giving myself a huge nudge and getting over a few hiccups I do believe I am one step closer to having my authentic art voice singing in my work.
I used a heat tool - or heat pen it is sometimes called. I had purchased some stencil blanks and spent a long hour pushing that tool through the stencil material. Yikes. It was thick and gummed up the tool tip and kept leaving threads of plastic attached to the corners where I had cut. Frustrating to say the least. But I did manage to cut out a flower shape and was quite pleased with the outcome. On my second attempt I used a more complicated design and didn't even get a quarter of the way through - it was not worth the frustration.
On Instagram I got the suggestion to use plastic folders for the stencil material and I remembered I had a pad of acetate hanging around. The acetate is much easier to glide the heat pen through and away I went!!
I used a glass cutting board that I found cheap at the thrift store. I taped my design underneath the glass and taped the acetate to the top of the glass. I find it's easier to pull the tool towards you rather than away from you. It is also easier for me to do lines all running in the same direction to get a flow going - then flip the cutting board around and do another direction.
It took a bit of time to get through drawing with the heat tool on this stencil but after I was done I pushed all the cut out pieces out and my stencil was ready to go.
A quick test with some spray inks -
And then spray inks on to a wood panel over top of some collage. I blended the spray inks with some white acrylic and some watered down self leveling gel. Now the panel is ready for some Mandala drawing.
I used a heat tool - or heat pen it is sometimes called. I had purchased some stencil blanks and spent a long hour pushing that tool through the stencil material. Yikes. It was thick and gummed up the tool tip and kept leaving threads of plastic attached to the corners where I had cut. Frustrating to say the least. But I did manage to cut out a flower shape and was quite pleased with the outcome. On my second attempt I used a more complicated design and didn't even get a quarter of the way through - it was not worth the frustration.
On Instagram I got the suggestion to use plastic folders for the stencil material and I remembered I had a pad of acetate hanging around. The acetate is much easier to glide the heat pen through and away I went!!
I used a glass cutting board that I found cheap at the thrift store. I taped my design underneath the glass and taped the acetate to the top of the glass. I find it's easier to pull the tool towards you rather than away from you. It is also easier for me to do lines all running in the same direction to get a flow going - then flip the cutting board around and do another direction.
It took a bit of time to get through drawing with the heat tool on this stencil but after I was done I pushed all the cut out pieces out and my stencil was ready to go.
A quick test with some spray inks -
And then spray inks on to a wood panel over top of some collage. I blended the spray inks with some white acrylic and some watered down self leveling gel. Now the panel is ready for some Mandala drawing.
Have you made your own stencils? Try it - it's easy peasy once you get the hang of it!
Thursday, February 07, 2013
My Lovely Gelli Plate
First off, let me just say that I am no way affiliated or compensated by any of the brands I mention here on my blog - I fall in love with supplies and want to share my enthusiasm for them.
I love my Gelli Plate!! I had never done any kind of print making before picking up this awesome supply and once I started it has become an addiction. I don't think I've even begun to explore all the different things I can do with it but I am having fun doing what I'm doing. Plain and simple - layers. I love the layers I can get with it!!!
Here's a little show and tell of one tiny little gelli plate session
I picked some colours to squirt on the plate - these are heavy body acrylics
The paint was pretty much used up from the stencil so I pulled the stencil off and smashed it down on a journal page to create a negative image of the stencil.
I love my Gelli Plate!! I had never done any kind of print making before picking up this awesome supply and once I started it has become an addiction. I don't think I've even begun to explore all the different things I can do with it but I am having fun doing what I'm doing. Plain and simple - layers. I love the layers I can get with it!!!
Here's a little show and tell of one tiny little gelli plate session
I picked some colours to squirt on the plate - these are heavy body acrylics
Then I used my Catalyst wedge to spread the paint around.
I laid a stencil over top of the spread paint - in this pic below you can see I spread some of the left over paint onto a sheet of paper which will become a painted page to use in collage.
To pull prints from the stencil, I used a couple of already painted pages and a vintage book page
The paint was pretty much used up from the stencil so I pulled the stencil off and smashed it down on a journal page to create a negative image of the stencil.
The paint dries quite fast so I had to move quickly (it helps to have several journals and pages and painted backgrounds ready to pull prints with) and laid another painted page over top of the gelli plate and opened my journal to another page to try to use up all the paint before it dries. My favourite prints are the ones from these last few pulls where the paint has dried in some spots and it is really random how the print will turn out.
I hope you enjoyed seeing one of my Gelli Plate sessions!! Would love to know if you've ever tried monoprinting before!!
Wednesday, August 08, 2012
Spray Ink Background Tutorial
I've fallen in love with spray inks! I own Adirondack and also the Dylusions which are my fave for the bright colours. I stumbled upon a way to use them as backgrounds for my mandalas - it is more fun for me to draw them on colourful backgrounds.
Spray inks are water soluable and I find when I don't seal them with something the inks rub off on my hands while drawing - they also are a bit too vibrant for a background with marker so I like to knock them back a bit with a glaze of acrylic paint.
You can try any kind of paper - these papers I am using in this book are everything from copy paper to wallpaper samples to handmade papers to textbook pages etc. I find that a page prepared with Gesso is NOT a good foundation for the inks - they tend to slide right off and we are looking for saturation with the inks.
This is my Big Bertha journal which I am using pretty exclusively at this point for mandalas.
Using the spray inks - spray through a stencil of your choice - once your spraying is complete - press a spare book page into the leftover ink on top of the stencil and you have a page all ready to collage or use some other way - and you haven't wasted the ink ;)
You can blot any excess drops of ink if desired with a paper towel being careful not to scrub - the inks run and mix really easily. Once the ink is dry - seal it with a glaze of clean water and self leveling gel with a drop or two of white fluid acrylic paint per side of spread.
I start with a brush dripping with fresh water and carefully (no scrubbing) running it over the page loading more water as needed - and then adding a bit of the white paint and making sure it is even and spreading it adding a brush load of self leveling gel to all the page so the water - paint and gel mix without disturbing the ink too much. My goal here is to seal the page - and to knock back the intensity of the inks without blending the colours too much. Of course experiment and find the affects you prefer.
Here is the left side of the spread completed - and I am not thrilled with how it turned out - I had 3 drops of white and I find it covered too much of the colour so I wiped off a drop of the white I had laid out on the right side.
And the completed page which I will let dry - or speed up with my craft heat gun - and then spray with a varnish - matte finish. The self leveling gel is sticky and tacky even when dry - the pages tend to stick together pulling off when the page is opened - the spray varnish leaves it with a smooth matte finish that is wonderful and not sticky. I've worked over the varnish with paint, marker, gel transfers etc with good success.
Heh - so I wasn't happy with how that spread turned out - the colours were knocked back a bit too much for me. I made another spread and took pics along the way. Same technique - all except instead of using book pages to sop up the leftover ink I pressed another spread from this journal over it - I love the negative effect.
You now have a colourful page to decorate as you wish - I've used this technique with 300lb Arches cold pressed watercolour paper and collage - it worked wonderfully!
I hope you enjoyed this tutorial and have fun putting your own spin on it :)
Spray inks are water soluable and I find when I don't seal them with something the inks rub off on my hands while drawing - they also are a bit too vibrant for a background with marker so I like to knock them back a bit with a glaze of acrylic paint.
You can try any kind of paper - these papers I am using in this book are everything from copy paper to wallpaper samples to handmade papers to textbook pages etc. I find that a page prepared with Gesso is NOT a good foundation for the inks - they tend to slide right off and we are looking for saturation with the inks.
This is my Big Bertha journal which I am using pretty exclusively at this point for mandalas.
Using the spray inks - spray through a stencil of your choice - once your spraying is complete - press a spare book page into the leftover ink on top of the stencil and you have a page all ready to collage or use some other way - and you haven't wasted the ink ;)
Here is the left side of the spread completed - and I am not thrilled with how it turned out - I had 3 drops of white and I find it covered too much of the colour so I wiped off a drop of the white I had laid out on the right side.
And the completed page which I will let dry - or speed up with my craft heat gun - and then spray with a varnish - matte finish. The self leveling gel is sticky and tacky even when dry - the pages tend to stick together pulling off when the page is opened - the spray varnish leaves it with a smooth matte finish that is wonderful and not sticky. I've worked over the varnish with paint, marker, gel transfers etc with good success.
I ended up making several pages to blot up the excess ink and now have a nice little stash for collaging or cutting up into shapes to use in my art journaling.
You now have a colourful page to decorate as you wish - I've used this technique with 300lb Arches cold pressed watercolour paper and collage - it worked wonderfully!
I hope you enjoyed this tutorial and have fun putting your own spin on it :)
Sunday, April 29, 2012
Family Inheritance
This post has been sitting in Draft for many many days now.
I guess it's sometimes tough to lay out my emotions. Either that or I am lazy ;)
Seriously though, stigmas concerning mental illness make me angry - I am trying to change that.
This is in my Anxiety Journal - an appropriate place for it.
My usual method of working in my journals is creating several backgrounds in one sitting having fun with paint, collage, gel transfers etc. Then when I feel the urge to journal I flip through my book to see which page calls to me and fits my mood. I have never created a page from start to finish in one sitting - until this page.
On this page was a failed - in my mind - attempt at using an image transfer - it was an inkjet copy used with self leveling gel - it didn't work. The image smudged, the image wore off, it didn't work to my satisfaction at all. You couldn't even recognise faces - my Geda holding me with my Baba and my older sister Carol. I love this pic - there is a cow in the background!! Anyway, one day I was playing around with some crackle paint and spread some over the pic to see if it would improve it. Much to my delight it did! I got out my Distress ink - vintage photo - and spread it around the edges.
I had a greenish background in my head - I used Green Gold and Titanium White - not completely covering the page - just here and there....
Whoa!! too limey yellow - toned it down with some light blue.....first sponging it on and then blending and rubbing some off with a baby wipe....
not quite the colour I was going for....I wanted to push it back a bit....I swear I owned Paynes grey - I must have taken it to leave in Phoenix at Carol's house. So I improvised - picking out a more neutral blue and a grey - again sponging on and then wiping off with a baby wipe...
ahh yes....Titan Buff!! the awesome colour that just kind of pulls everything together for me. A fairly solid layer sponged on and then immediately water drops from my fingers sprayed all over.
After waiting a minute or two to let dry a bit - dabbed off with a tissue and then when almost dry I rubbed with same tissue to buff and weather it a bit.
The page titled itself - Family Inheritance. I used rubber stamps with a sepia liquid acrylic.
I guess it's sometimes tough to lay out my emotions. Either that or I am lazy ;)
Seriously though, stigmas concerning mental illness make me angry - I am trying to change that.
This is in my Anxiety Journal - an appropriate place for it.
My usual method of working in my journals is creating several backgrounds in one sitting having fun with paint, collage, gel transfers etc. Then when I feel the urge to journal I flip through my book to see which page calls to me and fits my mood. I have never created a page from start to finish in one sitting - until this page.
On this page was a failed - in my mind - attempt at using an image transfer - it was an inkjet copy used with self leveling gel - it didn't work. The image smudged, the image wore off, it didn't work to my satisfaction at all. You couldn't even recognise faces - my Geda holding me with my Baba and my older sister Carol. I love this pic - there is a cow in the background!! Anyway, one day I was playing around with some crackle paint and spread some over the pic to see if it would improve it. Much to my delight it did! I got out my Distress ink - vintage photo - and spread it around the edges.
All of a sudden something clicked. This page with my grandparents illustrated deep thoughts that had been on my mind for quite sometime. The genetic aspect of anxiety and mental illness. I have suffered from anxiety all my life and depression on and off for over 20 years. Mental illness - both diagnosed and undiagnosed is prevalent on both sides of my family. It is daunting to think what I have passed on to my daughters. I am not blaming or taking blame - just acknowledging the very real family history.
I got out my swirly stencil and my trusty Tri-Art Transparent Brown liquid acrylic.....
I had a greenish background in my head - I used Green Gold and Titanium White - not completely covering the page - just here and there....
Whoa!! too limey yellow - toned it down with some light blue.....first sponging it on and then blending and rubbing some off with a baby wipe....
ahh yes....Titan Buff!! the awesome colour that just kind of pulls everything together for me. A fairly solid layer sponged on and then immediately water drops from my fingers sprayed all over.
After waiting a minute or two to let dry a bit - dabbed off with a tissue and then when almost dry I rubbed with same tissue to buff and weather it a bit.
The page titled itself - Family Inheritance. I used rubber stamps with a sepia liquid acrylic.
Thank you for indulging me. I believe by initiating discussion we can break down those old ideas about mental illness and maybe we can start to heal.
My sister Carol is coming over today to work in our journals - it is going to be a great day!!
Subscribe to:
Posts (Atom)